
3D Printed FPV Drone DIY Guide

Follow this beginners’ 3D Printed FPV Drone DIY Guide to design, print, and assemble your own drone.
TL;DR: Ready to build a durable FPV drone? Check the "Techniques & Materials" section, or jump to "How to DIY a 3D-Printed FPV Drone" for step-by-step instructions.
Introduction
Building a 3D printed FPV drone has gained traction among hobbyists and drone enthusiasts due to its affordability, customizability, and the thrill of creating a personalized flying machine. With 3D printing technology, designing and assembling your own FPV (First-Person View) drone has never been easier.
Whether you're into drone racing or aerial videography, 3D printing offers a cost-effective way to create drones that fit your specific needs. In this guide, we’ll explore how to craft your own 3D printed FPV drone from scratch.
What is an FPV Drone?
Definition
An FPV (First-Person View) drone is a type of drone equipped with a camera that streams real-time video footage to the pilot, providing a first-person perspective from the drone’s viewpoint.
Unlike traditional drones, FPV drones are often used for drone racing, freestyle flying, and immersive videography, giving pilots a thrilling "in-the-cockpit" experience.
These drones are built for agility, speed, and precision, and can be customized to enhance performance and suit different flying styles, making them ideal for both competitive and recreational use.
Types of FPV Drones
FPV drones come in several types, each catering to different flying experiences and purposes:
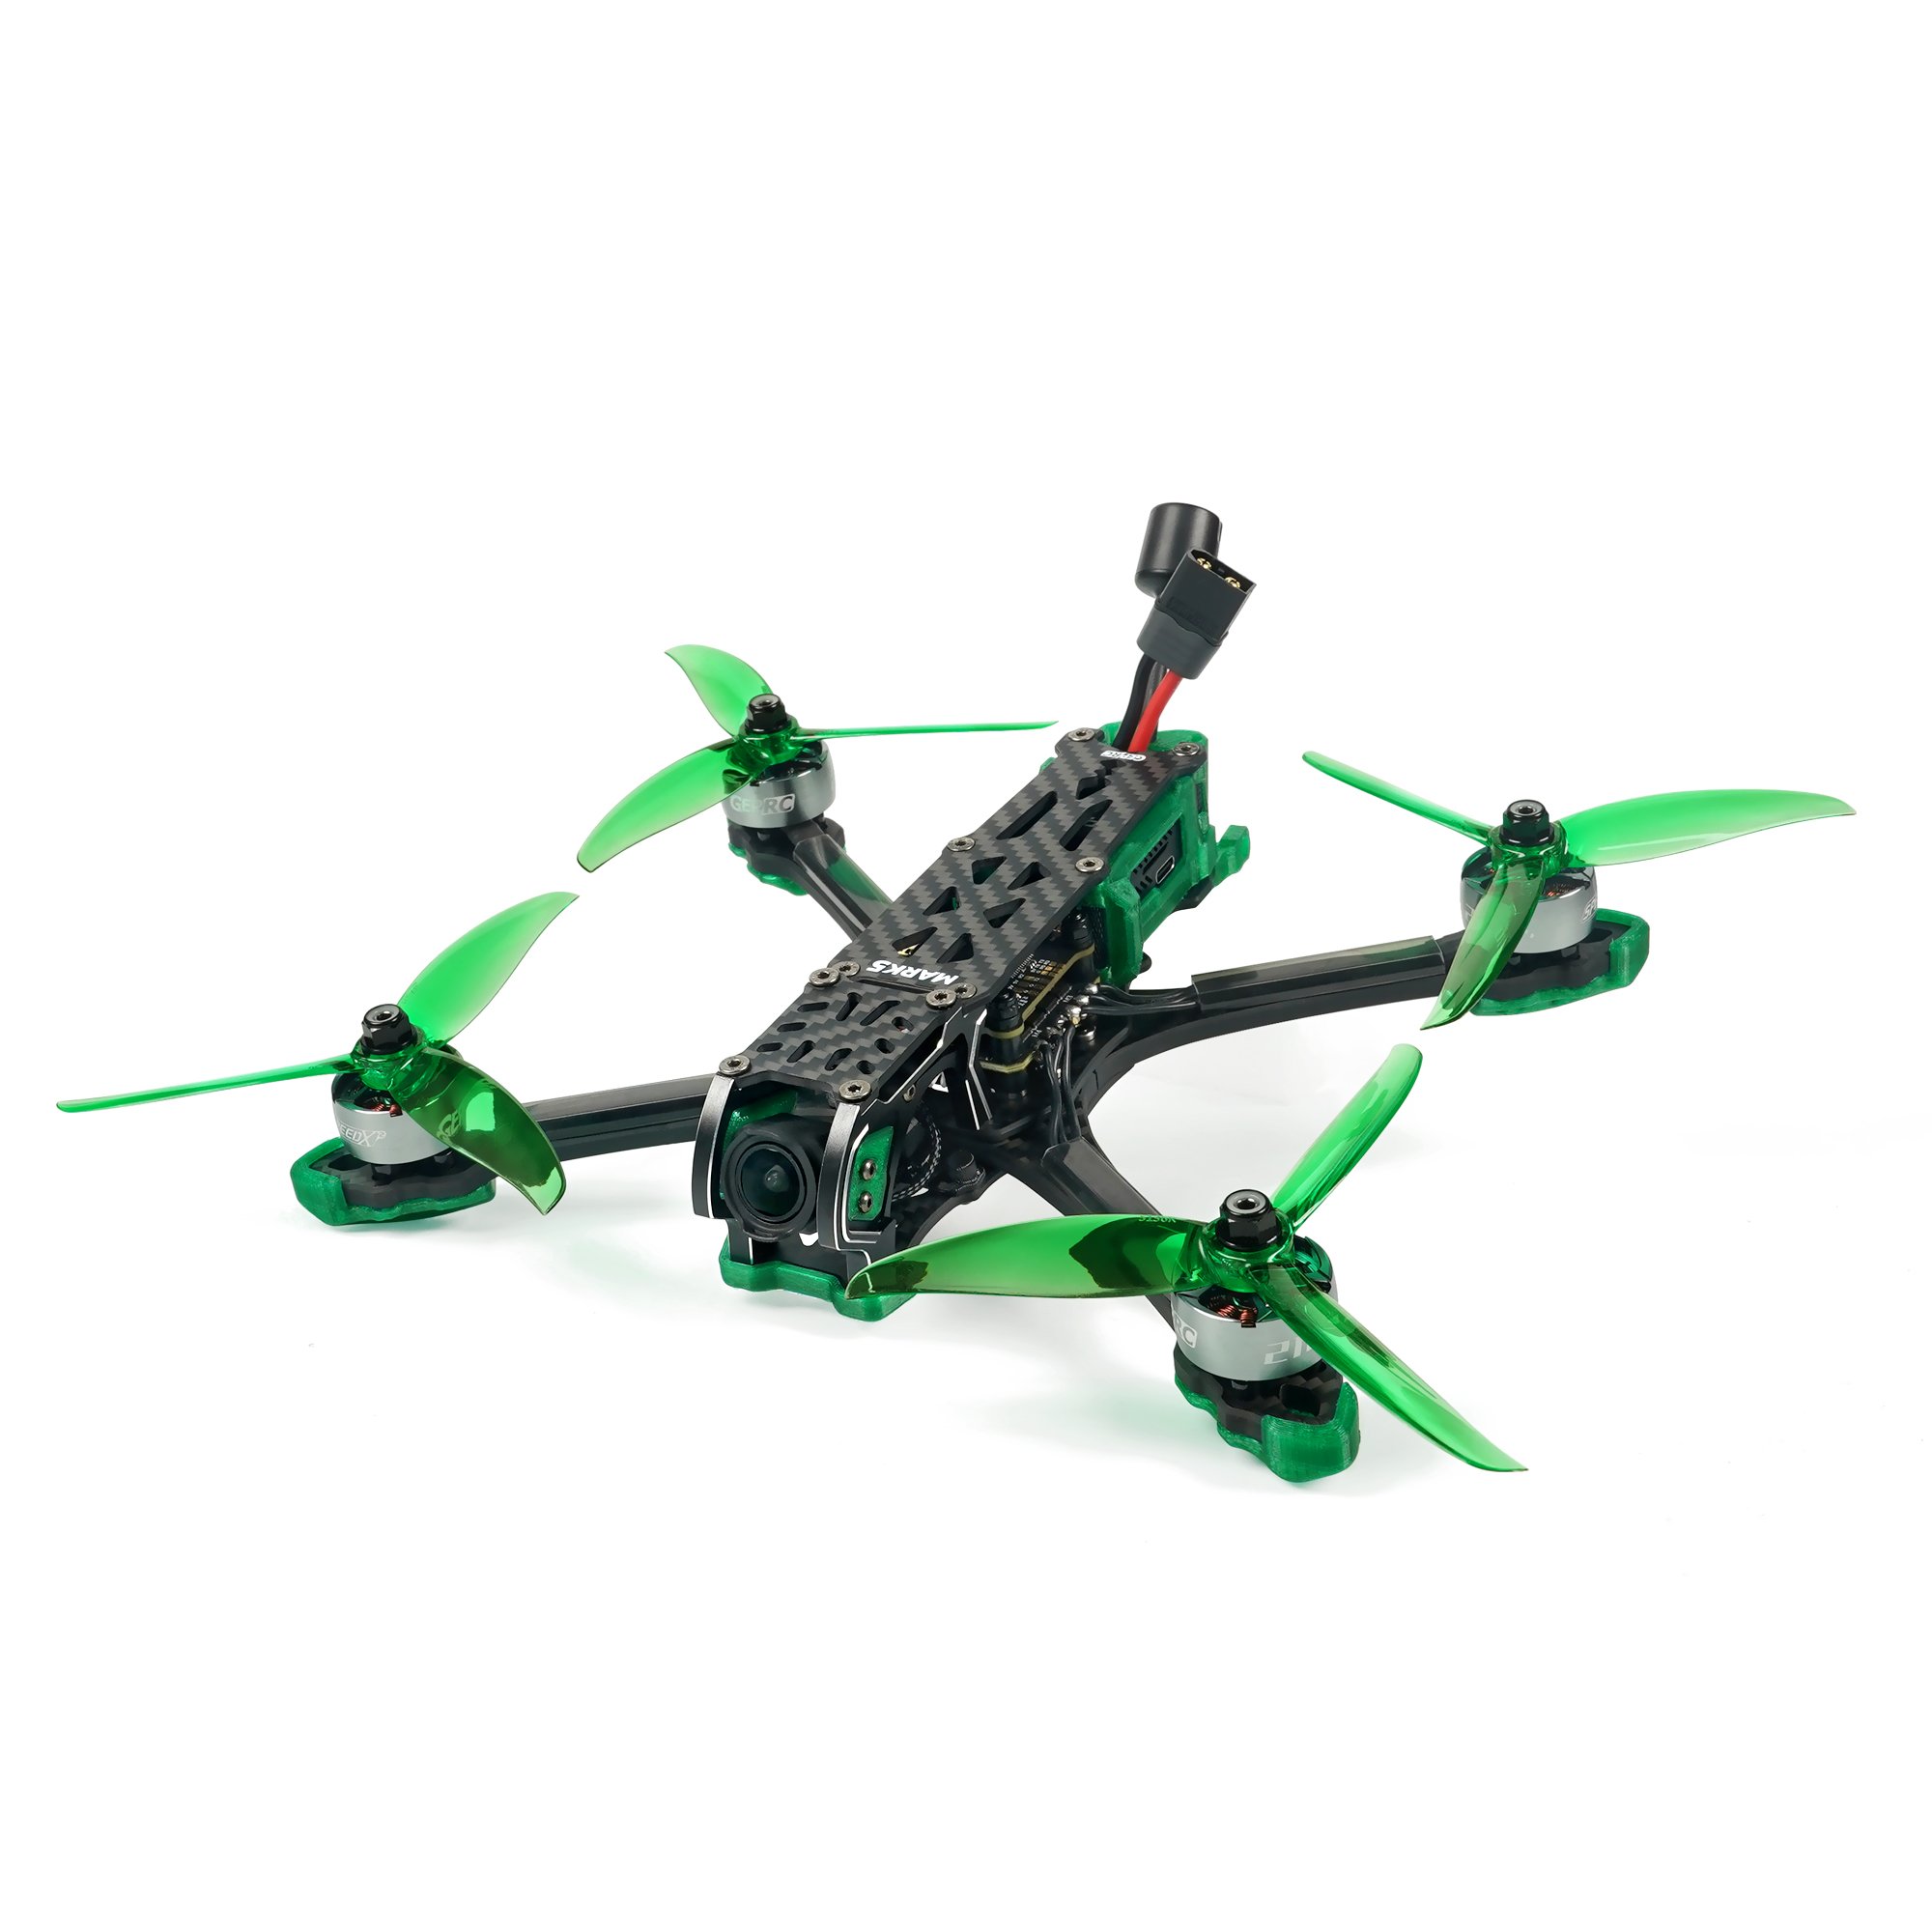
Racing FPV Drones: Built for speed and agility, often used in drone racing competitions. These drones are lightweight and highly responsive.

GEPRC’s Racing FPV Drone
Source: geprc.com
Freestyle FPV Drones: Designed for acrobatic flying, they offer greater maneuverability and durability for stunts and tricks.
GEPRC’s Freestyle FPV Drone
Source: geprc.com
Cinematic FPV Drones: Focused on smooth, high-quality video capture, these drones are used for filming and content creation.
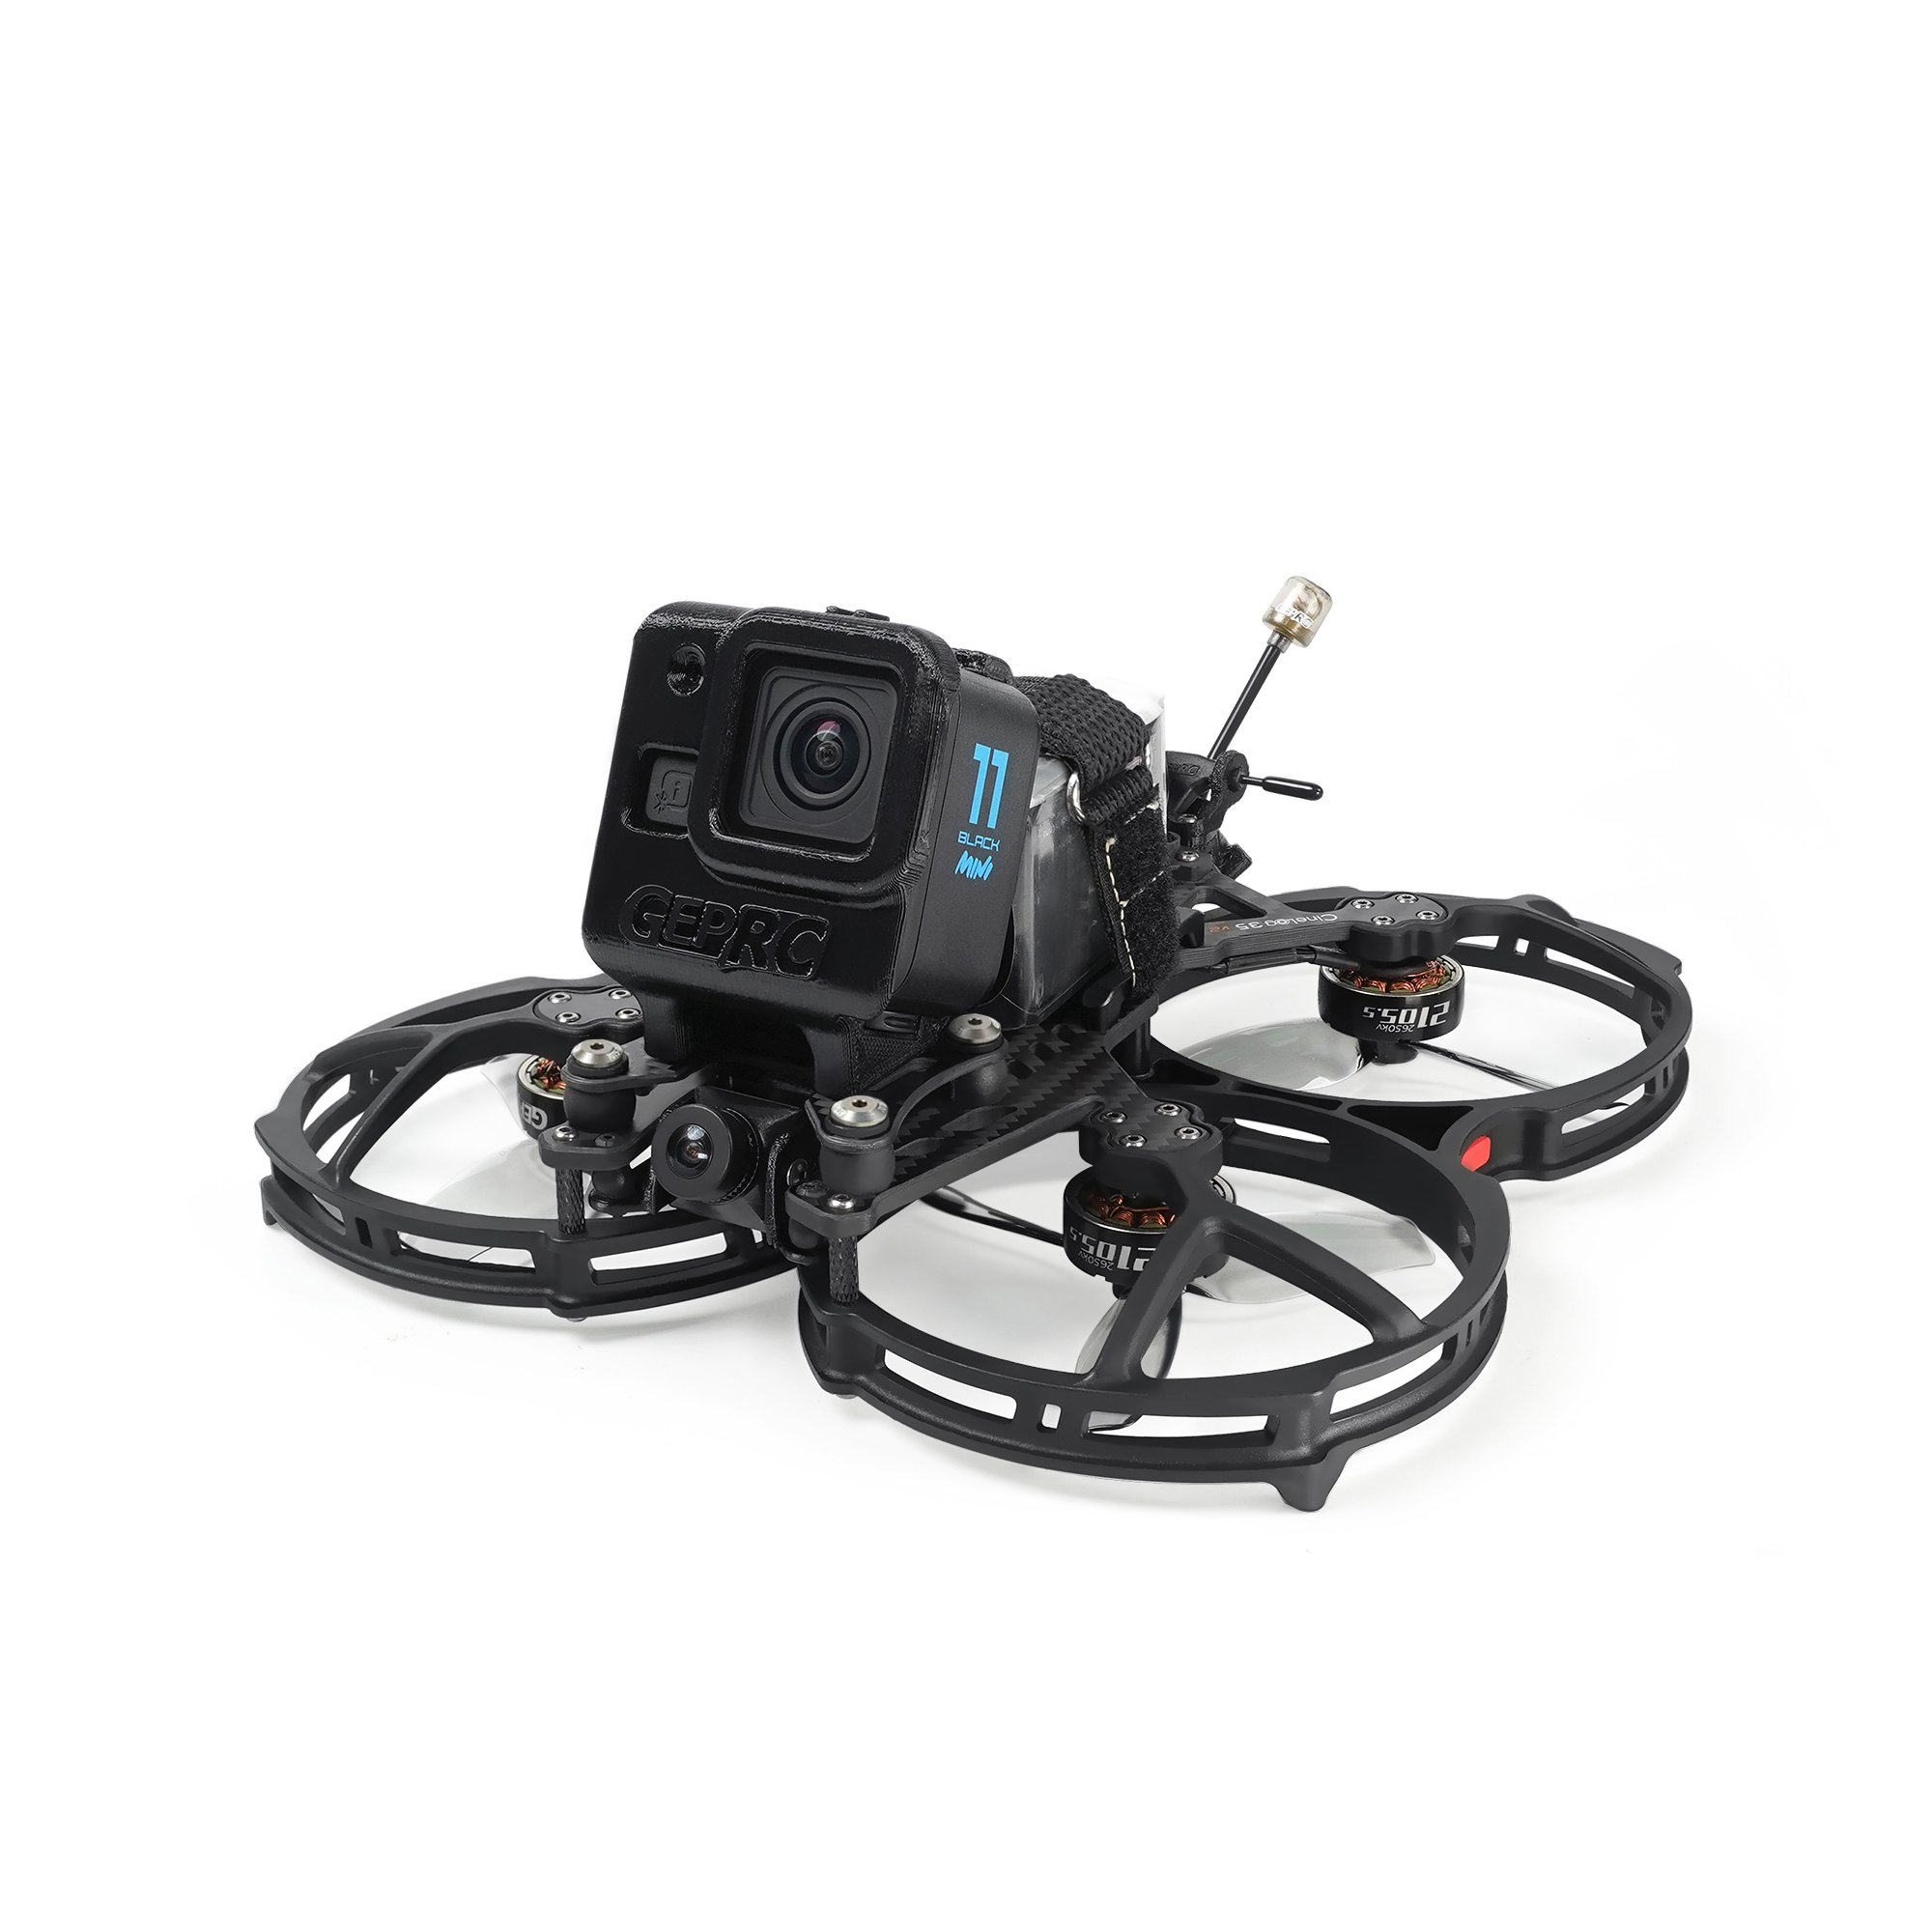
GEPRC’s Cinematic FPV Drone
Source: geprc.com
Tiny Whoop Drones: Tiny Wood is a brand of small, lightweight indoor FPV drones. Over time, it has been used to refer to this specific type of drone. Tiny Whoop Drones are small and agile, great for indoor flying and learning FPV skills.
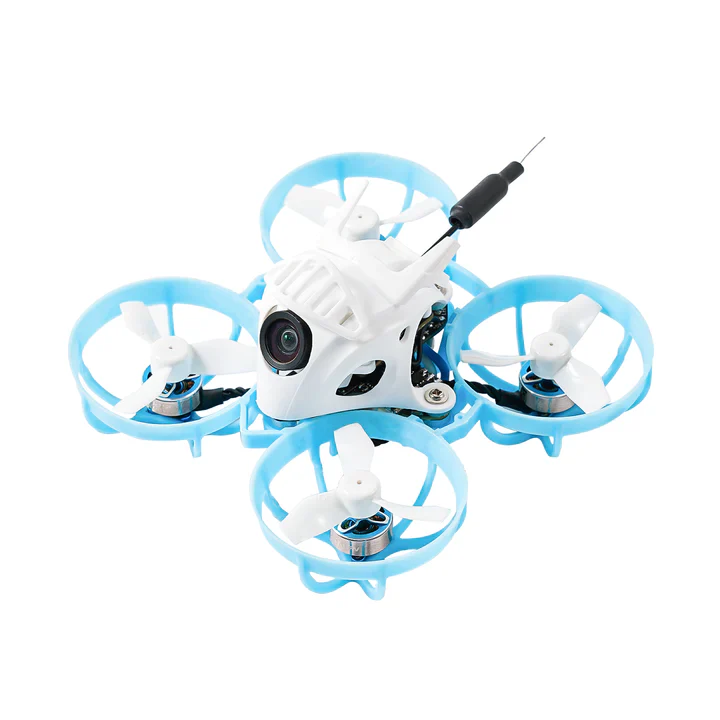
Tiny Whoop Drone
Source: tinywhoop.com
Long-range FPV drones: Designed for extended flight distances, often spanning several kilometers while maintaining stable video and control signals. They are ideal for exploration and aerial mapping, prioritizing endurance and range over speed and agility.
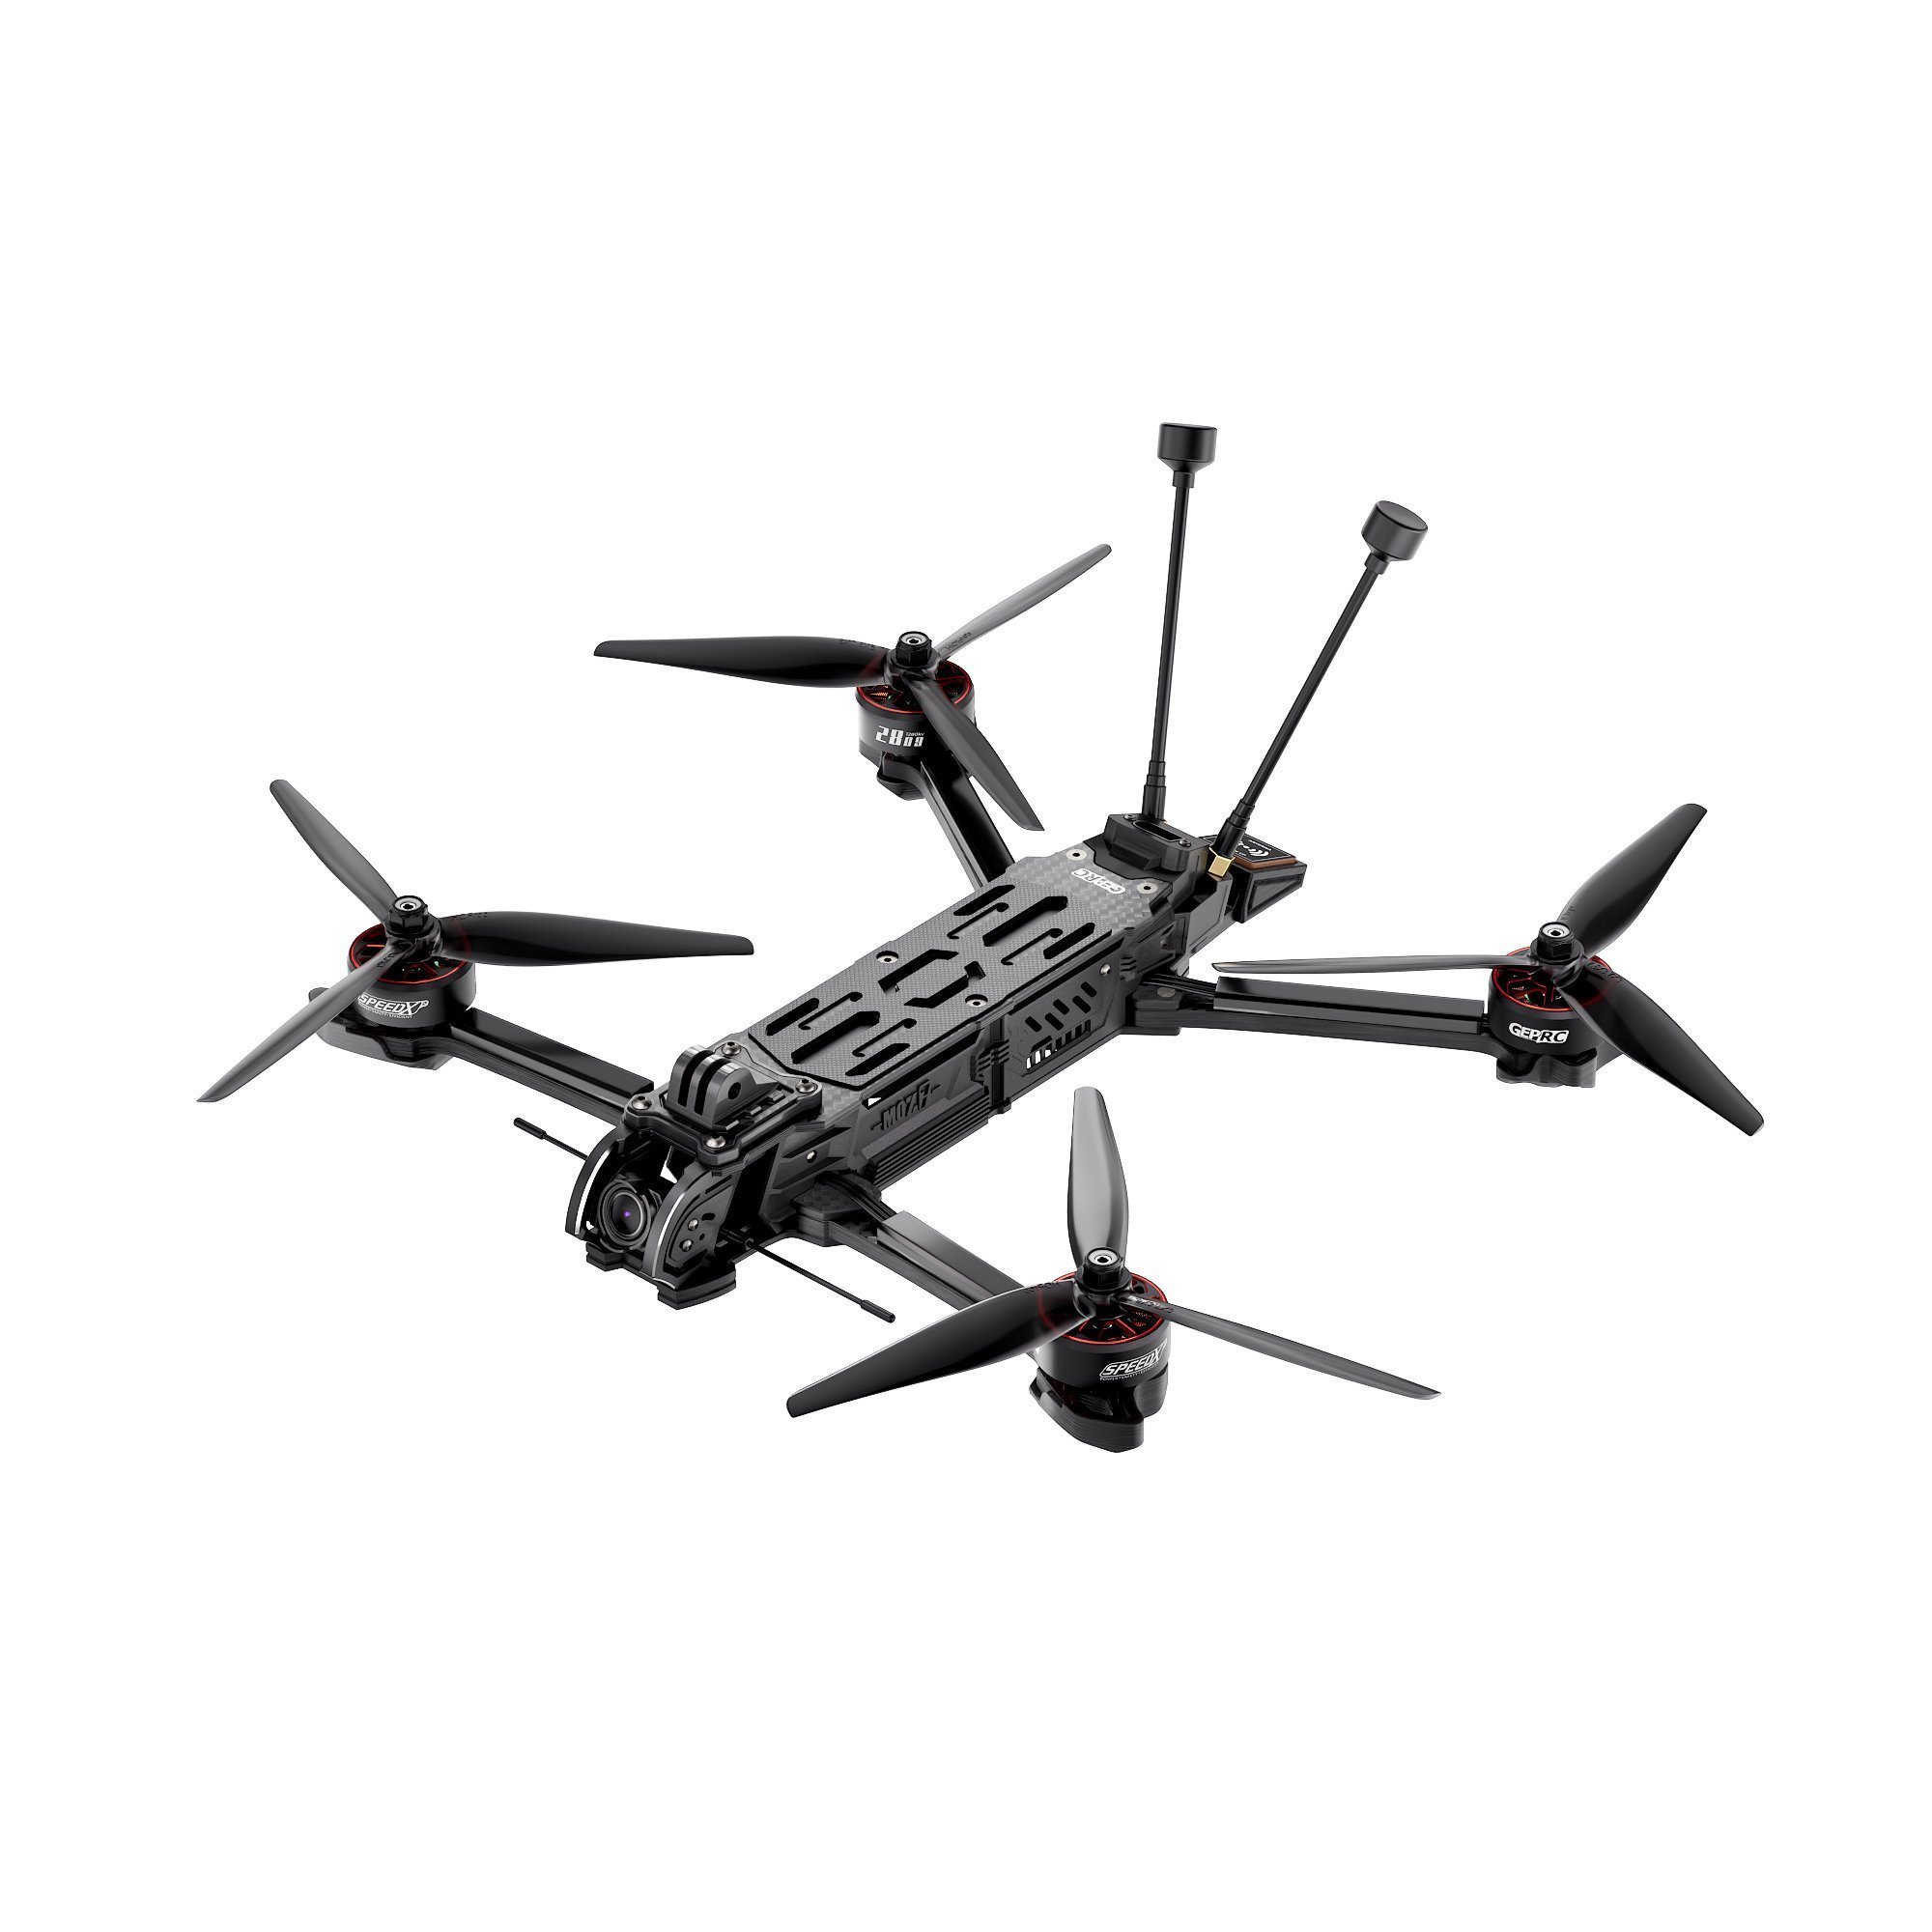
GEPRC’s Long Range FPV Drone
Source: geprc.com


Major Components of FPV Drones
Major Components | Description |
|---|---|
Frame 
| The structure that holds all the parts together. |
Motors 
| Four (for quadcopters) motors that provide thrust for flight. |
ESCs (Electronic Speed Controllers) 
| Control the speed of each motor. |
Flight Controller 
| The brain of the drone, handling all flight dynamics. |
FPV Camera 
| Captures real-time video feed. |
VTX (Video Transmitter) 
| Transmits the live video feed to the goggles or screen. |
Batteries 
| Typically LiPo (Lithium Polymer) batteries, known for their high energy density and lightweight design. |
Benefits of 3D Printing in FPV Drones Manufacturing
Unlike traditional manufacturing methods of injection molding or CNC machining, 3D printing has revolutionized the manufacturing of FPV drones by offering flexibility, cost savings, and efficiency.
The following table compares 3D Printing with traditional manufacturing methods in terms of 6 aspects, highlighting the key benefits of 3D printing in FPV Drones manufacturing.
Aspect | 3D Printing | Traditional Manufacturing |
|---|---|---|
Customization | Highly customizable, allowing easy modifications | Limited customization; molds or tools need changes |
Cost | Cost-effective for low-volume production and prototyping | Expensive for small batches, cheaper for mass production |
Speed | Quick prototyping and part iteration | Slower for custom parts due to tooling requirements |
Material Waste | Minimal waste, only uses material needed | Higher waste due to cutting and shaping processes |
Complexity | Easily handles complex geometries | Complex parts require more effort and higher costs |
Repair | Damaged parts can be reprinted quickly and inexpensively | Requires ordering replacement parts or complex repairs |
Techniques & Materials for FPV Drone 3D Printing
In FPV drone parts manufacturing, three types of printing methods are widely used: FDM, SLA, and SLS/MJF.
However, choosing the right method isn't just about which drone you are flying—it depends on your specific priorities:
Budget vs. Durability: Do you want a cheap frame that is easy to replace (Home FDM)? Or do you need a "tank" that can survive high-speed crashes into concrete without breaking (Industrial SLS)?
Prototype vs. Production: Are you testing a new shape, or building your main freestyle rig?
Which 3D Printing Technique Should You Use?
While FDM is great for accessibility, durability is often the deciding factor for serious pilots. The following table breaks down the strengths of each technique to help you decide which fits your flying style.
Technique | Description | Materials | Best For Which Drone Types? | Performance Rating | Relative Cost |
|---|---|---|---|---|---|
Melts plastic filament layer by layer, making it ideal for flexible parts or inexpensive, disposable frames. | TPU: Flexible and crash-resistant; PLA: Cheap but brittle, suitable for non-critical parts; PETG: Heat-resistant, slightly heavier | Cinematic (Cinewhoops): Soft TPU propeller guards; Tiny Whoops: Cheap, replaceable frames; Accessories: GoPro mounts, arm guards | ★★★ (Soft Parts / Entry Level) | $ (Low) | |
Uses light to cure liquid resin, producing high-detail parts. Generally too brittle for structural or functional drone frames. | Standard Resin: High-detail, smooth finish; Tough Resin: Improved durability but still fragile | Display Models: Static or decorative models; Micro Tiny Whoops: Extremely small, non-impact builds | ★ (Display Only / Not Recommended for Flight) | $$ (Medium) | |
Uses a laser to sinter powder, creating near-isotropic, lightweight, and durable parts. Industrial-standard method suitable for functional, high-performance components. | Nylon (PA12): High strength-to-weight ratio, heat-resistant, slightly flexible to absorb impact; TPU: Flexible parts for vibration damping | Racing Drones: High rigidity and precise tuning; Freestyle Drones: Durable for crashes; Long-Range Drones: Lightweight for efficiency | ★★★★★ (Pro / Structural Parts) | $$$ (High) |
Detailed Analysis by Drone Type
1. For Racing & Freestyle Drones
● Recommendation: SLS Nylon (PA12)
● Why: Racing and Freestyle drones face high-speed impacts with concrete and metal gates.
FDM Issue: FDM-printed frames (PLA/PETG) often suffer from delamination (splitting between layers) during crashes. They also lack the stiffness needed for tight PID tuning, causing vibrations.
The Industrial Solution: SLS Nylon provides a unibody structure similar to injection molding. It is stiff enough for responsive flight but has just enough "give" to absorb hard crashes without snapping, making it superior to home-printed alternatives.
2. For Cinematic Drones
● Recommendation: Hybrid (SLS Frame + FDM TPU Ducts)
● Why: Cinewhoops need to be safe to fly around people.
The Propeller Guards (Ducts) should be printed in FDM TPU (soft rubber) to bounce off obstacles safely.
The Main Frame holding the motors and camera must be rigid to prevent "jello" (video vibration). SLS Nylon is the perfect choice here to keep the drone vibration-free for smooth footage.
3. For Tiny Whoop Drones
● Recommendation: FDM (Budget) or MJF/SLS (Performance)
● Why: Weight is everything for these micro drones.
Home Printing: FDM is great for cheap replacement frames, but the walls often need to be thicker to maintain strength, adding unnecessary weight.
Pro Performance: Industrial SLS/MJF printing allows for ultra-thin wall designs that are significantly lighter and stiffer than FDM prints. A stiffer frame translates to better flight performance and responsiveness in such small drones.
4. For Long-Range Drones
● Recommendation: SLS Nylon or MJF
● Why: Every gram matters for flight time.
The Industrial Solution: Industrial SLS printing allows for complex, hollow internal structures and thin-wall designs that reduce weight significantly compared to solid FDM prints, extending your battery life for long-range missions.
How Much Does a 3D-Printed FPV Drone Cost?
Ready to build your FPV drone? When it comes to printing the parts, you actually have two ways to go about it.
You can print the parts yourself on a desktop machine, or order industrial-grade parts to assemble at home. Both methods allow you to enjoy the satisfaction of building your own drone, but they come with different costs and durability levels.
Here is the cost breakdown for a standard 5-inch FPV drone build.
Component | Path A: Home-Printed DIY (Desktop FDM) | Path B: Printed for You, DIY Assembly (Industrial Service) |
|---|---|---|
Frame (Core) | $5 - $15 (Filament Cost, PLA/PETG)* | $40 - $100 (Industrial SLS Nylon) |
Motors (4x) | $40 - $60 | $40 - $60 |
Flight Controller & ESC | $50 - $80 | $50 - $80 |
FPV Camera & VTX | $30 - $60 | $30 - $60 |
Battery & Props | $20 - $30 | $20 - $30 |
Total Build Cost | $145 - $245 | $180 - $330 |
*Note: Home printing costs cover filament only and assume you already own a 3D printer ($200+).
Which DIY Path Should You Take?
1. The "Home-Printed" Path
Best for: Tinkerers who love tweaking printers as much as flying drones.
The Trade-off: You save money on materials, but you spend time handling bed adhesion, removing supports, and maintaining the printer. Parts are generally less durable and may require frequent re-printing after crashes.
2. The "Printed for You" Path
Best for: Pilots who want the durability of injection-molded plastic with the freedom of 3D design.
The Trade-off: You pay a service fee for the parts, but you get SLS Nylon (PA12)—a material that is nearly impossible to print well at home. It arrives ready to assemble, so you can focus entirely on the build and the flight.
Curious how much your design would cost?
Upload your CAD file to our Instant Cost Calculator and get a precise quote in seconds.
How to DIY a 3D-Printed FPV Drone?
When it comes to diy a 3d-printed fpv drone, two questions must be ironed out: what to print and how to print. In other words, as for the what, it means where to get the models; for the how, it refers to print the model via a self-owned desktop 3d printer or look for printing services. Let’s find them out in the following steps together.
Prepare Your Model
Get Free or Paid Drone Models
Free
We have gathered some popular free fpv drone models from popular 3d model websites. The followings are the details.
FPV Drone Model
Website and Author
File Format
Free or Paid
License

@ProgrammaDan
printables.com.stl
.stepFree
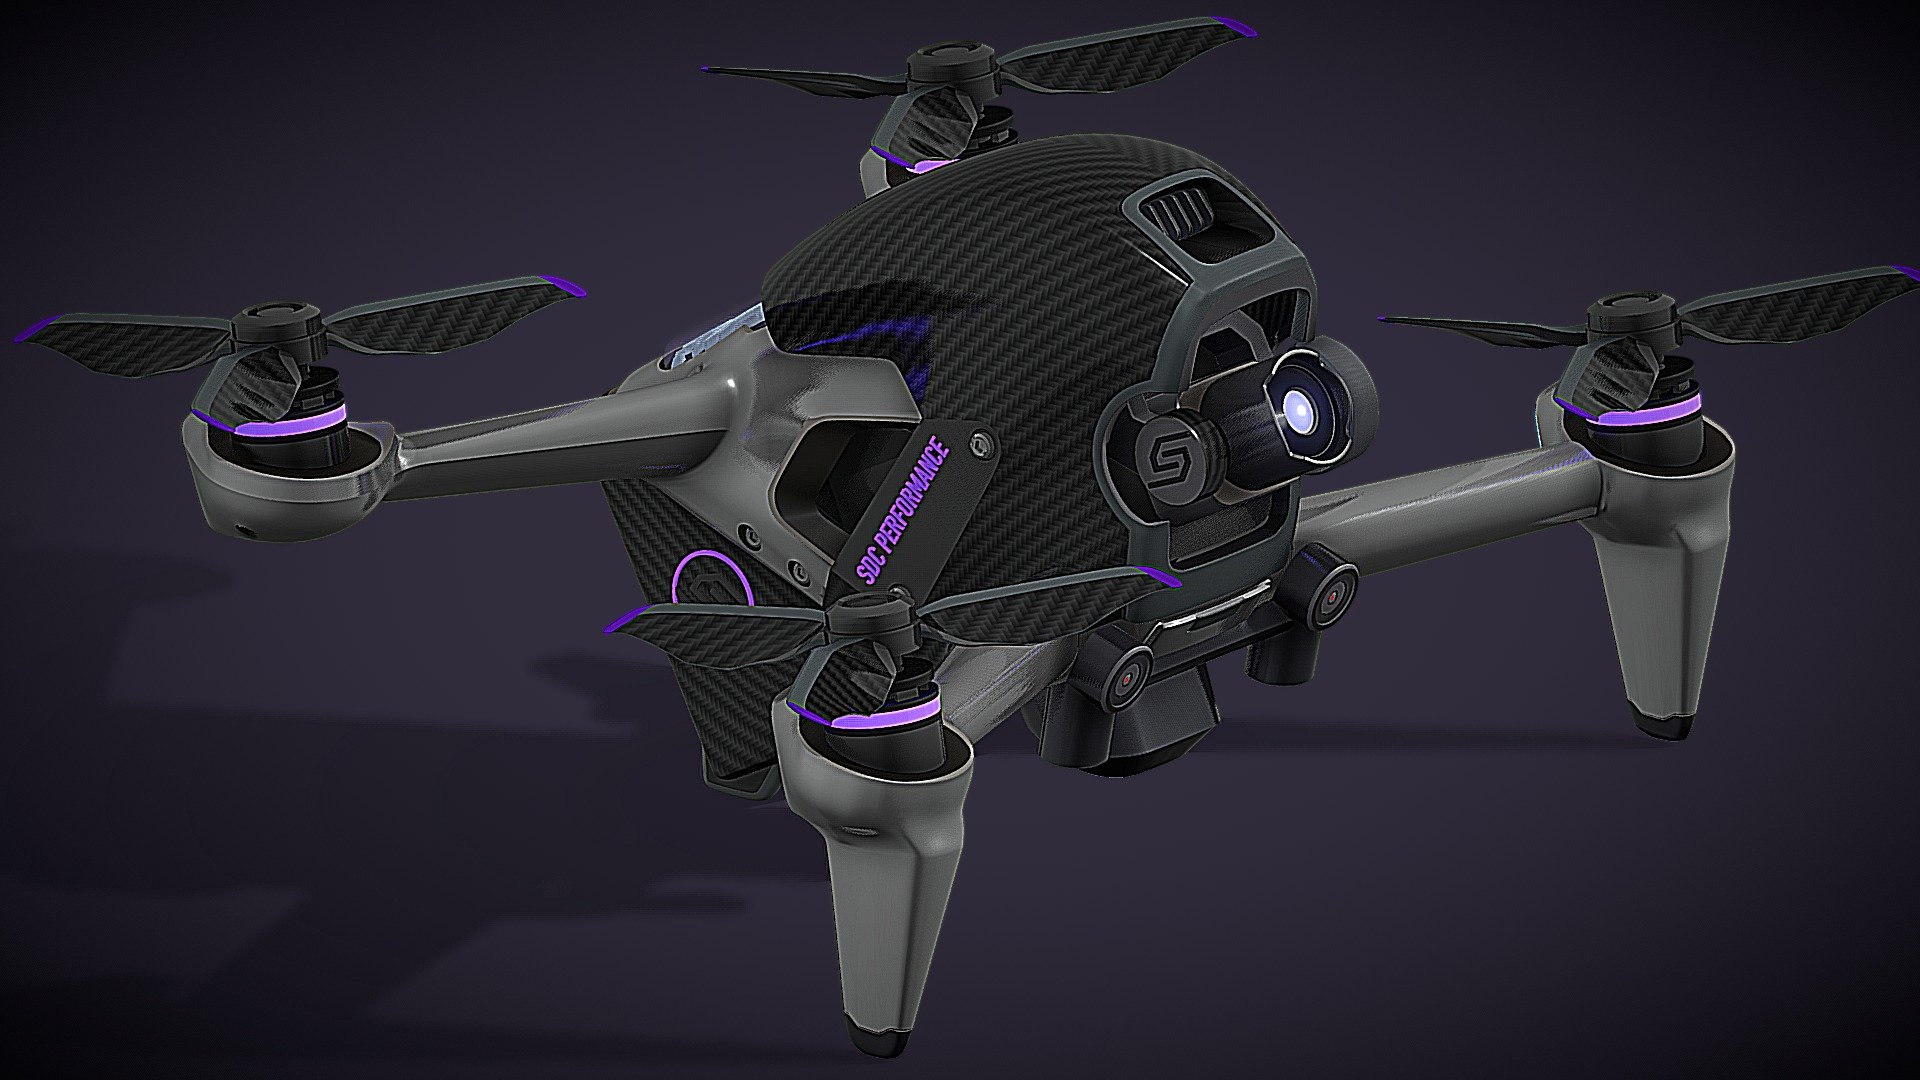
@SDC PERFORMANCE™
sketchfab.com.blend
.usdz
.gltf
.glbFree
@3dxl
cults3d.com.stl
Free
CC BY-NC-SA 4.0
No AI
@BLEND98
www.cgtrader.com.blend
Free
Royalty Free No Ai License
@resh_engine
www.cadcrowd.com.igs
Free
Paid
Except for the websites mentioned above, there are some other websites where you can get paid FPV drone models.
Website
Price Range
FPV Drone Models Available
$9-$349
50+
$17-$99
10+
$5-$95
200+
Free for Subscribers
50+


DIY FPV Drone Kit
CAD Design and Slicer Softwares To design your own drone kit model, CAD design and slicer softwares are essential. You can refer to the article “Free 3D Printing Software: 21 Useful Tools in 5 Categories” by All3DP to get a clear picture of them.
Design Tips
Frame Shape: Focus on X-frame for agility or H-frame for more space. Ensure the arms have proper thickness for strength but are as lightweight as possible.
Motor/Propeller Clearance: Leave sufficient space between arms and motors for propeller clearance and cooling.
Component Mounting: Add mounting points for flight controllers, cameras, and batteries. Include vibration dampening in the design for sensitive parts.
Cable Management: Include cable channels or slots in the frame to organize wires neatly and safely.
Modular Design: Make parts easily replaceable, especially the arms, to simplify repairs.
Aero Design: Keep the frame streamlined to minimize drag, while ensuring it's durable for flight.
Print the Drone Kit
DIY Printing
To have a more immersive DIY experience, you can choose to print the frame with a self-owned desktop printer. We have made a comparison table of the most popular desktop FDM printers for your references.
Printer | Price | Build Volume (mm) | Estimated Print Time for Drone Frame (200 x 150 x 50 mm) | Applicable Materials | Advantages |
|---|---|---|---|---|---|
Creality Ender 3 V2 Neo | $199 | 220 x 220 x 250 | 12-15 hours | PLA, ABS, PETG | Affordable, ideal for beginners; solid entry-level machine |
Prusa i3 MK3S+ | $1049 (semi-assembled) | 250 x 210 x 210 | 8-10 hours | PLA, ABS, PETG, ASA, Nylon, Flex | Highly accurate with excellent print quality; automatic bed leveling and flexible material compatibility |
Bambu Lab X1C | $1,449 | 256 x 256 x 256 | 4-5 hours | PLA, ABS, PETG, PA, PC, Carbon/Glass-reinforced materials | Fastest printing speed, multi-color capabilities, advanced sensors (LIDAR, humidity) |
Elegoo Neptune 4 Pro | $359 | 225 x 225 x 265 | 4-5 hours | PLA, ABS, PETG, ASA, TPU, Nylon | Best value for fast printing and quiet operation at a budget-friendly price |
Anycubic Kobra 2 Max | $429.99 | 420 x 420 x 500 | 4-5 hours | PLA, ABS, PETG, TPU | Largest build volume for large prints, great for big projects |
In Summary:
Creality Ender 3 V2 Neo: The most budget-friendly, making it ideal for beginners or hobbyists. Prusa i3 MK3S+: Offers the best print quality and accuracy, with a wide range of compatible materials and advanced features like automatic bed leveling. Bambu Lab X1C: Stands out for its speed, multi-color printing, and advanced technology like LIDAR sensors and humidity control. Elegoo Neptune 4 Pro: Combines affordability with fast and quiet operation, making it one of the best choices for those on a budget seeking speed. Anycubic Kobra 2 Max: Excels with the largest build volume, perfect for large-scale projects, and still manages to keep costs reasonable.
Look for Printing Services
If you don’t have access to a 3D printer or want a professional-grade result, Unionfab is a great option.
As Asia’s leading 3D printing company, Unionfab operates over 1,000 industrial-grade 3D printers and specializes in rapid prototyping and on-demand production. We offer a one-stop service from design, rapid prototyping, to final production.

Unionfab stands out in four key areas:
Experience: With 100 3D printers and 20+ years' experience in 3D printing.
Certification: Meet strict ISO 9001 quality standards.
Fast Shipping: Air shipments in 3-5 days via DHL Express and FedEx.
Cost: Up to 70% cheaper than European and American competitors.
Choose Unionfab and contact us for high-quality, affordable, and fast 3D printing services to create your perfect FPV drone kit.
Assemble the Drone
Mount the Motors: Secure the brushless motors to the 3D-printed frame.
Install ESCs: Attach the ESCs to the frame and wire them to the motors.
Attach the Flight Controller: Mount it centrally on the frame, connecting it to the ESCs and receiver.
Wiring and Soldering: Use a soldering iron to connect wires, ensuring all components have power and communicate correctly.
Install the FPV Camera and VTX
Mount the FPV Camera: Attach it using a 3D-printed camera mount.
Connect the VTX: Wire the video transmitter to the FPV camera and install the antenna.
Check Camera Angle: Make sure the camera angle suits your flying style (typically tilted slightly upward for faster flight).
Add the Battery and Other Components
Battery Holder: Use a 3D-printed battery mount to secure the LiPo battery in place.
Propellers: Attach the propellers to the motors, ensuring they are in the correct orientation for thrust.
Configure and Tune the Flight Controller
Software Setup: Use software like Betaflight to configure the flight controller, calibrate the accelerometer, and set flight modes.
Tuning: Adjust PID settings for optimal flight performance, which will vary depending on your drone’s weight and motor setup.
Test the Drone
Bench Test: Power on the drone, checking for correct motor operation and video feed on your FPV goggles or monitor.
Test Flight: Start with a low-altitude hover to ensure stability, then gradually perform more complex maneuvers as you confirm everything works.
Conclusion
Building your own 3D-printed FPV drone is a rewarding experience—you get to customize every part of your drone for racing, freestyle flying, or cinematic shots. With the right models, materials, and 3D printing techniques, you can create a durable, lightweight, and high-performance frame tailored to your flying style.
With Unionfab’s professional 3D printing services, you can get high-quality parts quickly and affordably, so you can focus on assembling and flying rather than troubleshooting prints.
New to Unionfab?
Get 10% off your first order and start building your perfect FPV drone today!