How to Polish Stainless Steel: Step-by-Step Guide & Tips

Learn how to polish stainless steel with this complete guide. From surface preparation to finishing touches, discover pro tips for stunning results!
Introduction
Polishing stainless steel often frustrates due to stubborn scratches, water spots, and uneven results. This guide simplifies the process, tackling these challenges with easy steps for a brilliant, hassle-free shine.
What Is Stainless Steel Polishing?

Stainless steel polishing is a mechanical or chemical process to refine the surface, remove imperfections, and enhance shine. It’s not just about aesthetics—polishing also improves corrosion resistance and hygiene, making it essential for industries from food service to aerospace.
Types of Polishing Techniques
When it comes to polishing stainless steel, the choice of technique depends on your project's scope, precision requirements, and the finish you desire.
Here's a look at four main methods, each designed for specific applications:
1. Hand Polishing
Manual use of abrasives (sandpaper, cloths, pastes).
Ideal for small areas, intricate designs, or touch-ups.
Tools: Microfiber cloths, sandpaper (120–1200 grit), polishing compounds (e.g., rouge).
2. Machine Polishing
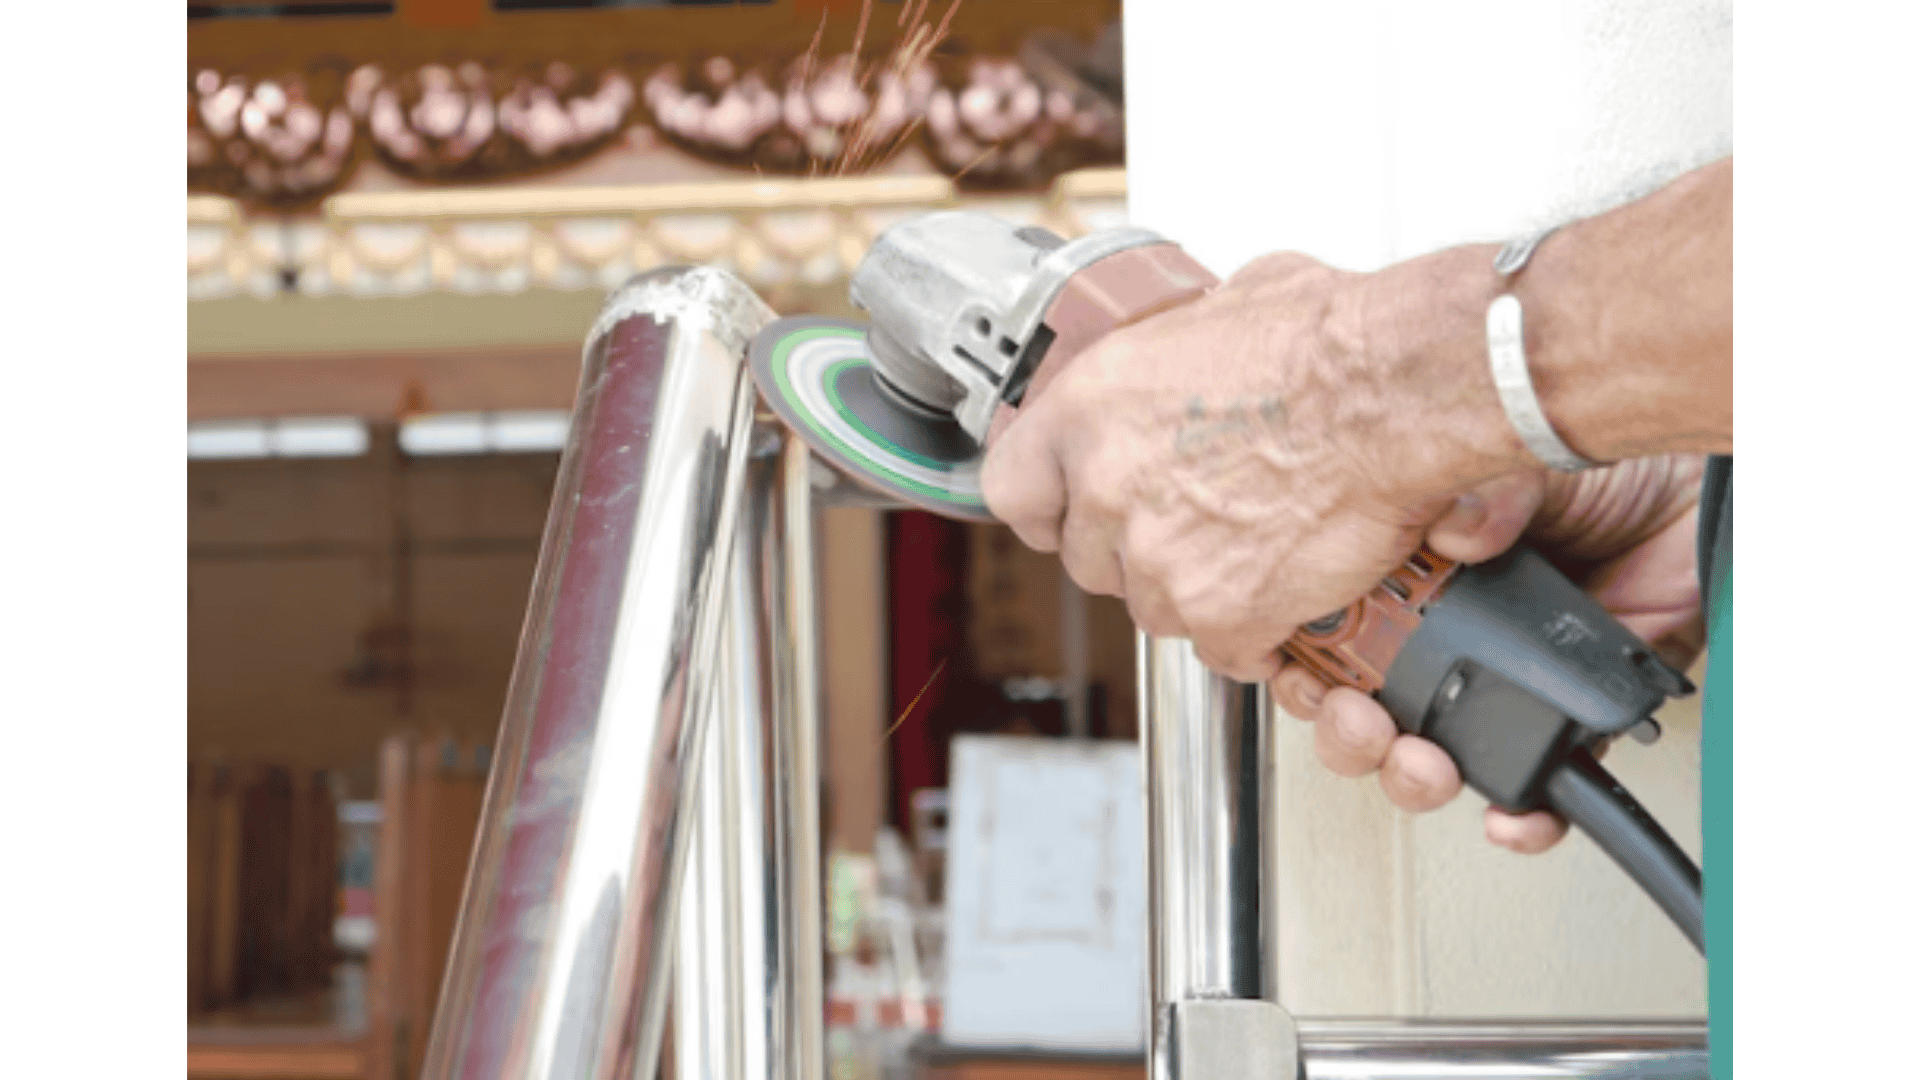
Uses electric buffers or grinders with buffing pads.
Efficient for large surfaces or uniform results.
Tools: Electric buffer, lamb’s wool/foam pads, diamond polishing paste.
3. Electrochemical Polishing (ECP)
Uses an electric current and chemical solution to smooth surfaces.
Achieves high precision and corrosion resistance (common in medical/aviation).
4. Chemical Polishing
Dissolves surface layers with acidic solutions to reduce roughness.
Suitable for complex geometries but requires strict safety protocols.
Surface Finishes Achievable
Finish | Description | Best For |
|---|---|---|
Mirror Finish 
| High-gloss, reflective surface. | Decorative items, kitchen appliances. |
Brushed Finish 
| Directional texture hiding scratches. | Automotive trim, architectural panels. |
Matte Finish  | Non-reflective, smooth surface with low sheen. | Modern design, electronics. |
Satin Finish 
| Soft, low-luster surface balancing aesthetics | Furniture, bathroom fixtures. |
Step-by-Step Guide to Polish Stainless Steel
Polishing stainless steel requires a systematic approach to ensure every imperfection is addressed, from initial cleaning to the final shine.
Below is a detailed, four-step process to achieve professional results, whether you’re restoring a small appliance or a large industrial component.
Step 1: Clean and Prepare the Surface
Before starting the polishing process, it is essential to have a clean, debris-free surface—tiny particles can damage the surface or reduce the effectiveness of the polishing compound.
Here’s how to prepare for effective polishing:
Gather Your Supplies:
Cleaning Agents: Mild dish soap, white vinegar, stainless steel cleaner (e.g., Windex).
Tools: Microfiber cloths, non-abrasive sponges, lint-free towels.
Optional: Baking soda (for scratches), distilled water (to prevent mineral spots).
Clean the Surface:
Wash with Soap and Water: Remove grease and fingerprints with soapy water.
Stubborn Stains: Use a soft sponge for sticky residue; never use steel wool.
Rinse and Dry: Use distilled water to avoid streaks; dry with a lint-free cloth.
Fix Minor Imperfections:
Light Scratches: Rub a paste of baking soda and water in the direction of the grain.
Water Spots: Wipe with equal parts white vinegar and water, then dry.
Step 2: Level the Surface (for Deep Scratches/Dents)
Start with Coarse Sandpaper: Use 120–220 grit to sand down high spots or deep scratches, working with the grain.
Check Progress: Wipe the surface regularly to ensure evenness.
Step 3: Sand with Finer Grit for Smoothness
Move to Medium Grit (400–600): Continue sanding with the grain, keeping the surface moist with water to reduce friction.
Finish with Fine Grit (800–1200): Achieve a uniform matte surface for optimal buffing.
Clean Again: Wipe with isopropyl alcohol to remove sanding dust.
Step 4: Buff with Polishing Compounds for a Brilliant Shine
As the most widely used polishing technique, buffing is pivotal for polishing stainless steel surfaces. Below details techniques, tools, and pro tips for mastering this essential process.
Here’s how to proceed:
Choose Your Polishing Compound:
A polishing compound is a granular abrasive material mixed with a binder (oil, wax, or water) used to refine surfaces, remove imperfections (scratches, oxidation), and enhance shine during the final stages of finishing.
Classified by abrasive particle size (precision), they are categorized into three main types:
Type | Abrasive Grit | Purpose | Common Abrasives | Applications |
|---|---|---|---|---|
Coarse | 80–220 grit | Heavy-duty removal of deep scratches, rust, or oxidation | Aluminum oxide, silicon carbide | - Restoring damaged automotive/metal surfaces |
Medium | 400–800 grit | Smoothing after coarse grinding; removing moderate scratches; pre-fine polish | Aluminum oxide (finer), synthetic diamond powder (coarse) | - Refining sanded stainless steel/aluminum |
Fine | 1000+ grit (ultrafine) | High-gloss finish; removing fine swirl marks; mirror-like surfaces | Cerium oxide, chromium oxide, ultra-fine diamond paste | - Automotive clear coats (showroom shine) |
Key Takeaways
The choice of polishing compound depends on the starting surface condition and desired finish:
Coarse for heavy repair,
Medium for intermediate smoothing,
Fine for ultimate shine and precision. Higher precision (finer grits) yields smoother surfaces but requires more passes and lighter pressure to avoid damage.
Hand Polish vs. Machine Polish
Method | Pros | Cons | Best For |
|---|---|---|---|
Hand Polish | Precise for small/intricate areas | Time-consuming | Jewelry, appliance touch-ups |
Machine Polish | Fast, uniform results for large areas | Risk of overheating/damage | Car bumpers, kitchen islands |
Achieving Matte or Brushed Finishes
Mirror finishes shine brightly, but many projects prefer the understated elegance of brushed or matte finishes—perfect for masking imperfections, minimizing glare, or creating a modern look.
Master these techniques:
Brushed Finish:
Sanding Method: Use 180–320 grit sandpaper or a Scotch-Brite pad, moving strictly with the grain.
Tool Options: Guided sanding blocks.
Maintenance: Wipe with a soft cloth weekly to prevent debris buildup.
Matte Finish:
Fine Sanding: Use 600+ grit sandpaper for a smooth, non-reflective surface.
Chemical Etching: Apply a commercial matte solution (wear gloves and ventilate).
Troubleshooting Common Issues
This section presents solutions to common issues in stainless steel polishing, covering pre-polishing precautions, frequent problems, and effective resolutions.
Pre-Polishing Precautions
Surface Contamination Control
Thoroughly degrease the surface to remove oils, coolant residues, and ferrous particles (risk of galvanic corrosion). Use non-chlorinated solvents (e.g., acetone) or alkaline cleaners.Avoid using steel wool or iron-based tools; opt for stainless steel or non-metallic brushes to prevent cross-contamination.
Abrasive and Tool Selection
Use a structured grit progression: Start with coarse abrasives for heavy defect removal, then transition to finer grits (400–2000 grit) for smoothing.
Choose alumina (Al₂O₃) or diamond abrasives for consistent cutting performance on stainless steel grades, as they resist clogging and wear.
Heat and Pressure Management
Maintain moderate polishing speeds (1500–2000 RPM) and apply even pressure (5–10 N/cm²) to avoid overheating. Stainless steel’s low thermal conductivity can cause localized tempering (blue/rainbow discoloration).
Use water-based coolants or lubricants to dissipate heat and prevent workpiece softening.
Common Issues and Solutions
Persistent Scratches or Swirl Marks
Causes: Inadequate grit progression (skipping grits), dull abrasives, or inconsistent pressure.
Solutions:
Follow a strict grit sequence and ensure each step fully eliminates marks from the previous grit.
Replace worn abrasives regularly and use a consistent polishing motion to avoid uneven wear.
Heat-Induced Discoloration (Tempering)
Causes: Excessive friction from high speeds, heavy pressure, or insufficient cooling.
Solutions:
Reduce wheel speed to 1200–1800 RPM for delicate finishes and use forced air or water cooling to maintain surface temperatures below 200°C (392°F).
Limit contact time with the polishing wheel to prevent localized overheating.
Orange Peel Effect (Surface Waviness)
Causes: Over-polishing annealed or soft-grade stainless steel with overly soft wheels.
Solutions:
Ensure the material is in a heat-treated or hardened state to resist plastic deformation.
Switch to semi-rigid foam or felt polishing wheels for final stages instead of soft cotton or wool wheels.
Pitting or Corrosion Post-Polishing
Causes: Residual acidic polishes or chloride contamination from improper rinsing.
Solutions:
Use pH-neutral or mild alkaline polishing compounds (pH 7–9) and avoid chlorinated agents.
Rinse thoroughly with deionized water after polishing and dry immediately to prevent electrolyte formation.
Uneven Shine or Hazy Appearance
Causes: Inconsistent pressure application, improper polish distribution, or residue from compound buildup.
Solutions:
Maintain a uniform back-and-forth or orbital motion to ensure even abrasion.
Clean the surface with isopropyl alcohol post-polishing to remove any residual compound before final inspection.
Key Considerations for Optimal Results
Material-Specific Approach: Adapt abrasives and techniques to the stainless steel type (austenitic, ferritic, martensitic) and its heat treatment state.
Process Discipline: Prioritize gradual grit progression and heat control over speed to avoid compromising surface integrity.
Post-Polishing Care: Apply protective coatings promptly to enhance corrosion resistance and preserve the finish.
Maintenance and Care
Once a flawless polish is achieved, proper maintenance is essential to preserve the beauty and durability of stainless steel. It prevents new scratches, stains, and dullness, ensuring longevity.
Here’s how to maintain your polished surface:
Daily Care:
Wipe up spills immediately (acidic liquids like juice can stain).
Clean weekly with a mild detergent and microfiber cloth.
Long-Term Preservation:
Avoid harsh chemicals (bleach, ammonia).
Apply Unionfab’s anti-oxidation spray quarterly to protect the finish.
When to Repolish:
Loss of shine, persistent water spots, or visible scratches.
Conclusion
Polishing stainless steel is a skill that combines patience and the right tools. Whether you opt for hand polishing or machine buffing, following the grain and using quality compounds will yield professional results.
Ready to transform your stainless steel project? For industrial projects or flawless finishes, Unionfab’s metal finishing services offer precision and efficiency—from small repairs to large-scale applications.

FAQs
How to polish scratched stainless steel?
Sand deep scratches with 120–220 grit, then progress to finer grits (400–1200) before buffing with rouge.
How to polish stainless steel to a mirror finish?
Use white rouge or diamond paste with a wool pad, buffing gently along the grain until reflective.
How to clean polished stainless steel?
Use a microfiber cloth and mild detergent; avoid abrasive tools.
How to polish tarnished stainless steel?
Clean first with vinegar and water, then buff with a coarse compound (red rouge) to remove oxidation.
What’s the best way to polish stainless steel?
For most projects, machine buffing with diamond paste offers the fastest, most consistent results.
How do you make stainless steel shiny again?
Follow the step-by-step guide: clean, sand (if needed), buff with fine polish, and protect with a sealant.
How to shine stainless steel naturally?
Use baking soda paste for light scratches or vinegar for water spots, then buff with a soft cloth.

