3D Printing First Layer Problems [+Tips & Solutions]

Master the first layer in 3D printing—solve adhesion issues, warping, and leveling problems for more reliable, high-quality prints.
Introduction


The first layer is the most important part of any 3D print. It helps the model stick to the bed and sets the foundation for the rest of the print. If the first layer fails, the whole print is likely to fail.
In this article, you’ll learn what the first layer is, why it matters, how to get it right, and how to fix common problems.
Overview of the First Layer
Before a successful 3D print begins, it all starts with a solid first layer. This simple yet crucial step lays the foundation for the entire print. In this section, we’ll cover what it is, why it matters, and how it affects your print’s outcome.
Understanding the First Layer
What is the first layer?
The first layer is the very first layer of filament deposited onto the print bed at the start of a 3D print. It acts as the foundation for the entire model and directly influences whether the print will succeed or fail. Why is it important?
The first layer is critical because it:
Ensures bed adhesion: A strong bond between the print and the bed prevents warping or shifting.
Impacts print quality: If the first layer is uneven, the rest of the print will suffer from poor alignment and layer inconsistency.
Saves time and material: Most print failures happen early. A perfect first layer means fewer failed prints and less wasted filament.
In short, the first layer sets the tone for everything that comes after. A good first layer = a good print.
Achieving a Good First Layer Requires Several Factors

The first layer is the foundation of every 3D print, and getting it right is critical for print success. A poorly printed first layer can cause warping, detachment, or complete print failure.
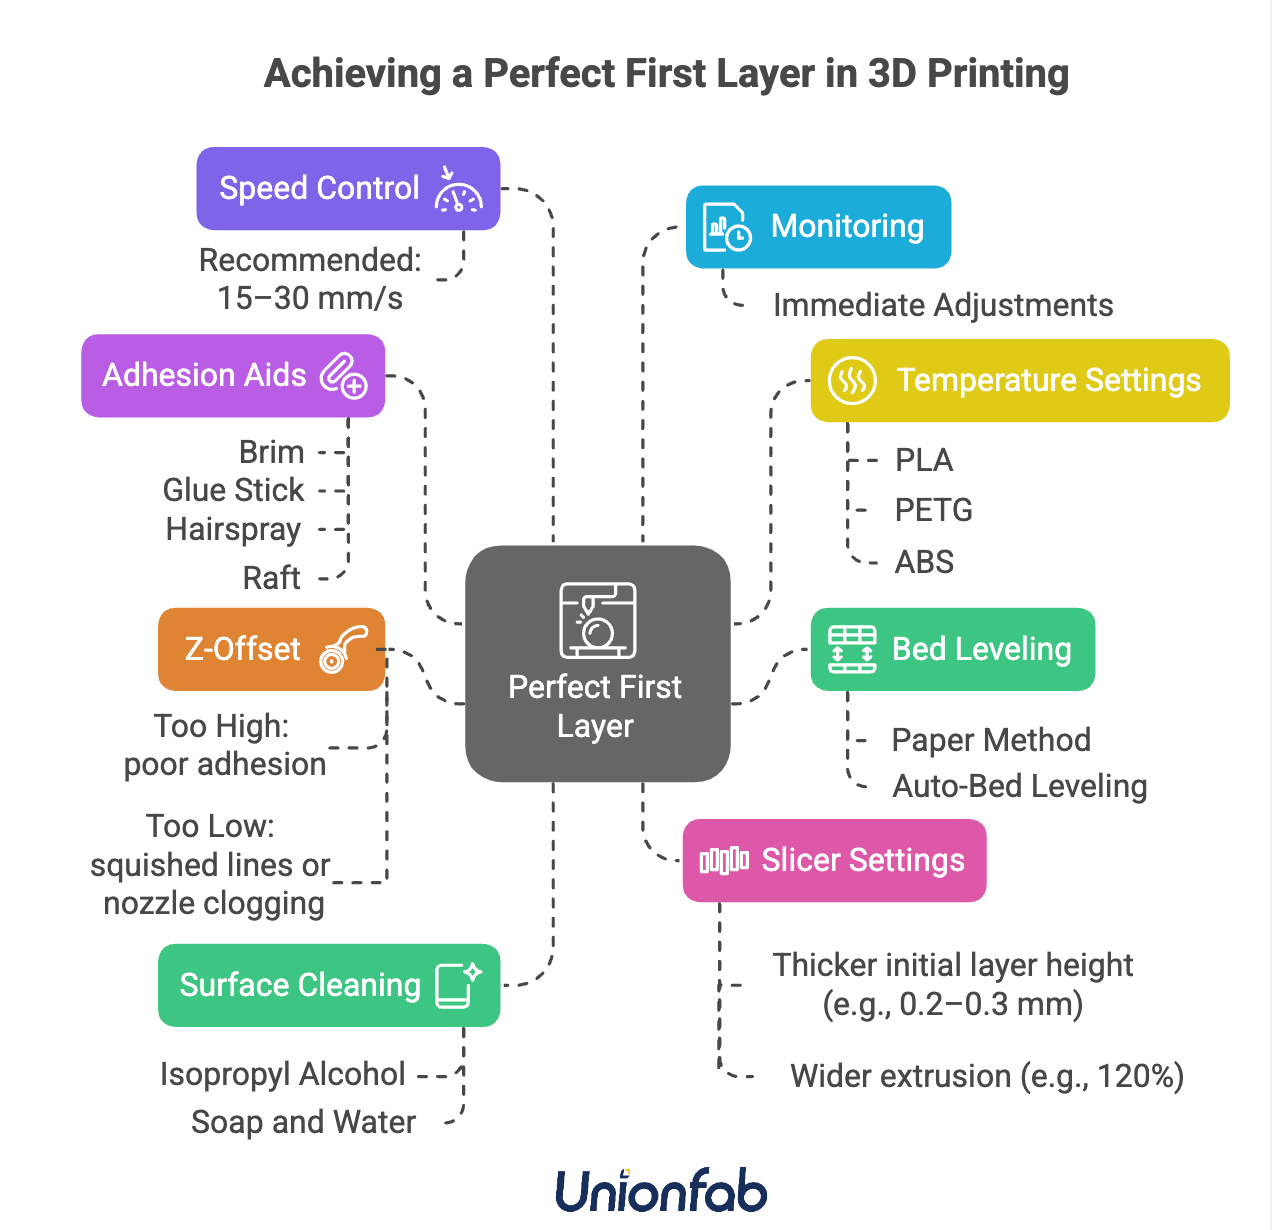
Fortunately, achieving a great first layer involves just a few key settings and best practices. Below are the essential factors that contribute to a strong, well-adhered first layer:
Key Factors for a Good First Layer:
Bed Leveling
Ensures that the nozzle maintains a consistent distance from the build surface.
Can be done manually (paper method) or with auto-bed leveling (e.g., BLTouch, CR-Touch).
Z-Offset (Nozzle Height)
Critical for the right amount of nozzle pressure on the filament.
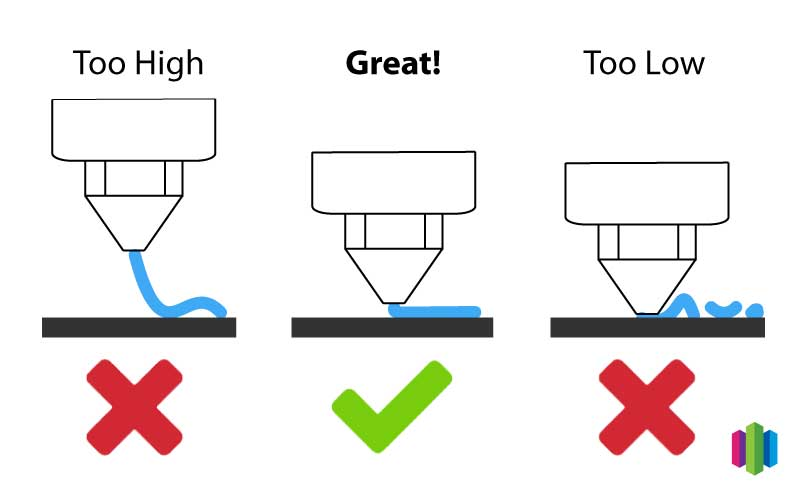
Too high = poor adhesion; too low = squished lines or nozzle clogging.
Bed and Nozzle Temperature
Proper temperatures help the filament stick and flow correctly.
Example:
PLA: 190–210°C nozzle, 50–60°C bed
PETG: 230–250°C nozzle, 70–90°C bed
Printing Speed (First Layer)
A slower speed allows better adhesion and smoother extrusion.
Recommended: 15–30 mm/s for the first layer.
Clean and Suitable Print Surface
Oils and dust can prevent proper adhesion.
Clean with isopropyl alcohol; use the correct surface for your material (PEI, glass, textured sheets, etc.).
Extrusion Settings
Use a thicker initial layer height (e.g., 0.2–0.3 mm) and wider extrusion width (e.g., 120%) to help with sticking.
Adhesion Helpers
Add a Skirt to prime the nozzle.
Use a Brim to increase contact area.
Add a Raft for difficult materials or when printing on uneven beds.
A successful first layer depends on a combination of hardware calibration (bed leveling and nozzle height), material-specific settings (temperatures and speeds), and proper surface preparation. Taking the time to perfect these elements will lead to more reliable, higher-quality prints.
Common 3D Printing First Layer Problems
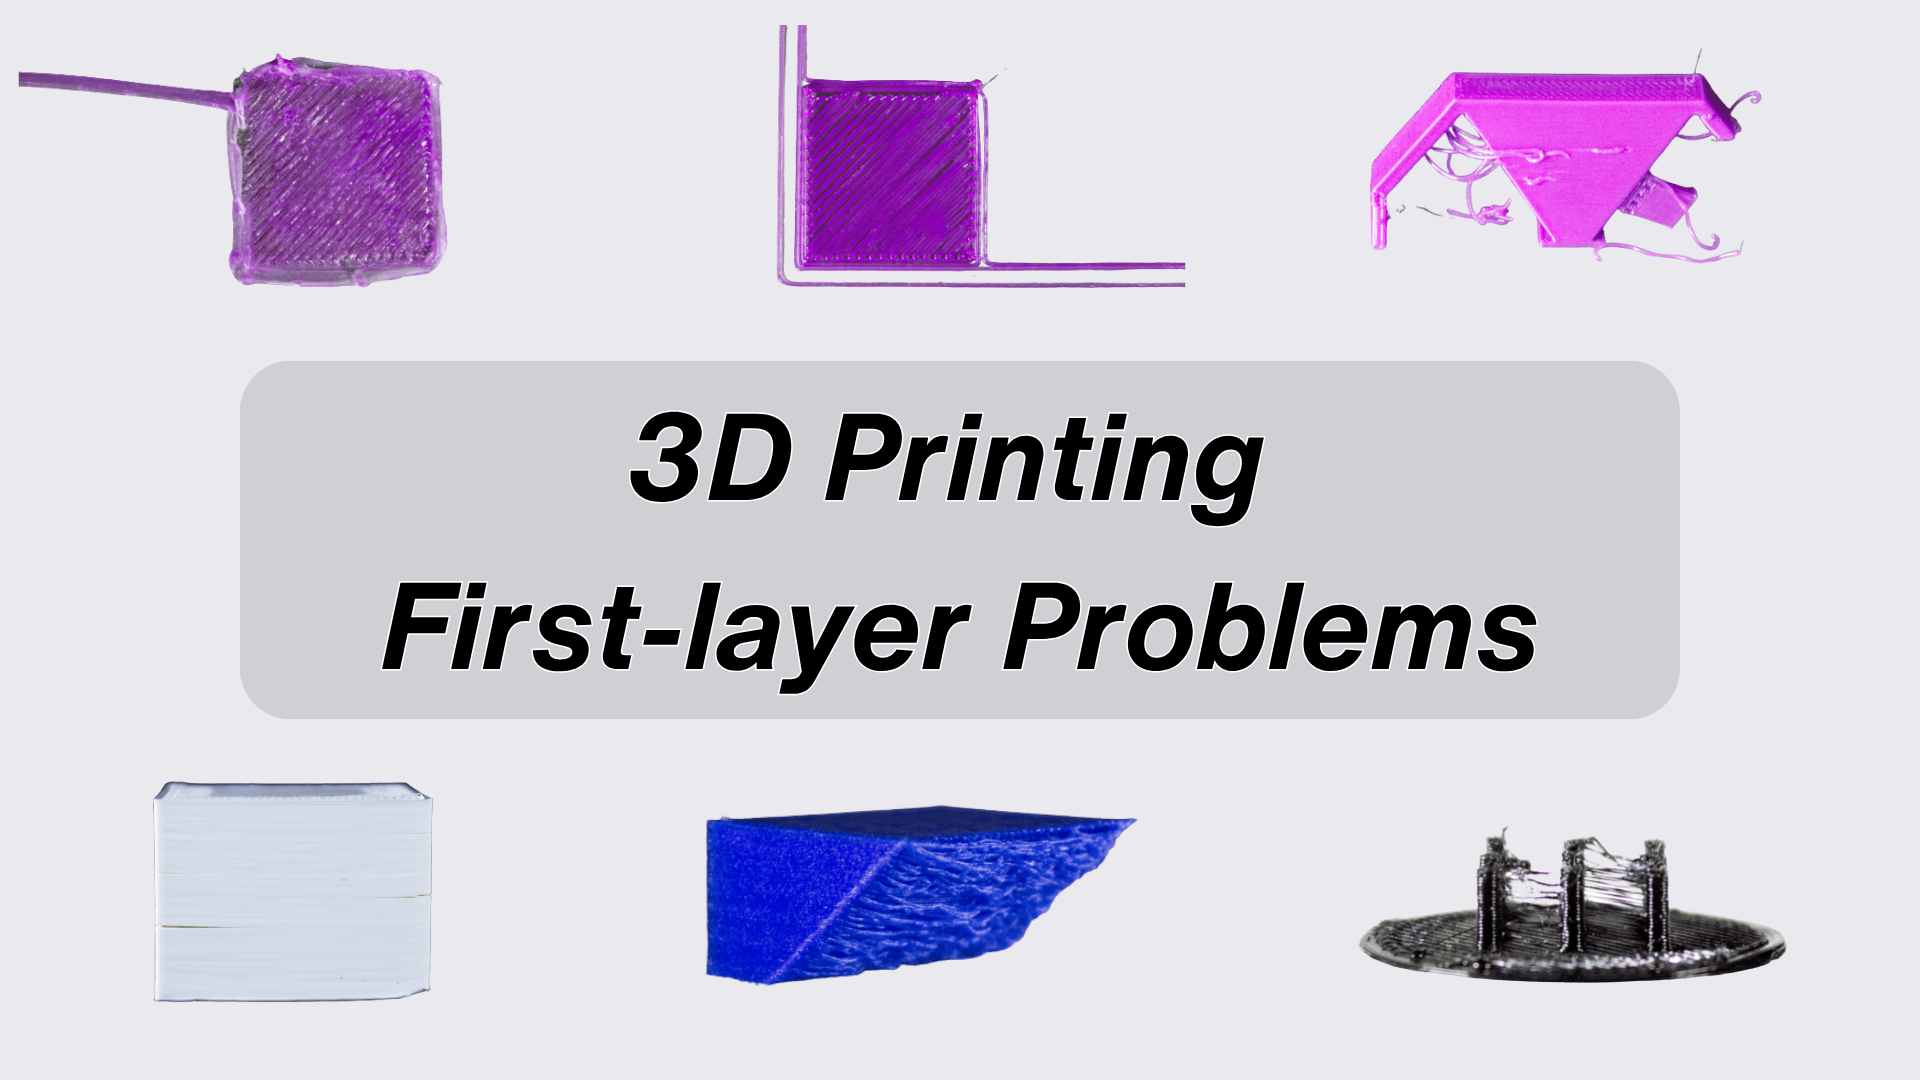
The first layer is the most critical part of any 3D print. If it doesn’t adhere properly or is laid down unevenly, it can cause warping, detachment, or even complete print failure.
Understanding the common issues that affect the first layer — along with their causes and solutions — can help you dramatically improve print quality and consistency.
First Layer Troubleshooting Table
Causes | Problems | Solutions |
|---|---|---|
Nozzle too far from bed | Filament doesn't stick to the bed; lines are thin or don’t adhere | Lower the nozzle height (adjust Z-offset); re-level the bed |
Nozzle too close to bed | Filament is squished too much; lines look flattened or smudged; may clog nozzle | Raise the nozzle slightly (adjust Z-offset) |
Bed not level | Uneven first layer; one side prints well, other side doesn’t | Re-level the bed manually or with auto-leveling; use mesh leveling if available |
Bed surface dirty or oily | Poor adhesion; filament lifts or peels off easily | Clean the bed with isopropyl alcohol or soap and water |
Bed or nozzle temperature too low | Poor bonding; corners lift or model detaches | Increase bed and/or nozzle temperature according to filament specs |
Print speed too fast | Filament doesn’t have time to stick; lines may curl or lift | Reduce first layer speed (15–30 mm/s recommended) |
Cooling fan on too early | Corners or edges lift (warping) | Delay part cooling fan until after the first few layers |
Under-extrusion on first layer | Gaps or broken lines; weak adhesion | Prime nozzle before print; increase initial extrusion or use a brim/skirt |
Incompatible or worn bed surface | Adhesion inconsistent; first layer peels | Replace worn build surface or use adhesive aids (glue, PEI, textured sheet) |
Incorrect initial layer height setting | Too thin: doesn't extrude well; too thick: doesn't stick | Adjust initial layer height to ~0.2–0.3 mm depending on nozzle size |
Summary:
Most first layer issues stem from improper bed leveling, incorrect nozzle height, dirty bed surfaces, or suboptimal temperatures.
The good news is that these problems are easy to detect and solve with some simple calibration and observation. Always watch the first few minutes of a print — it’s the best time to catch and fix issues before wasting material.
How to Get a Good First Layer on a 3D Printer?
The first layer is the foundation of your entire 3D print — if it doesn’t stick well or print evenly, everything that follows is at risk.
A successful first layer improves bed adhesion, surface quality, and overall print reliability. Fortunately, achieving a good first layer comes down to a few essential setup steps and careful calibration.
Step-by-Step Guide to a Perfect First Layer:
Level the Bed Accurately
Make sure the build plate is flat and evenly positioned.
Use a piece of paper or an auto-bed leveling sensor (like BLTouch).
The nozzle should just gently touch the paper without dragging hard.
Set the Correct Z-Offset
The Z-offset determines how close the nozzle is to the bed during printing.
If too high: the filament won’t stick.
If too low: it gets squished or doesn’t extrude properly.
Fine-tune the Z-offset until the first layer is smooth and slightly flattened.
Use Proper Bed and Nozzle Temperatures
Heating helps with filament flow and bed adhesion.
Example settings:
PLA: 190–210°C (nozzle), 50–60°C (bed)
PETG: 230–250°C (nozzle), 70–90°C (bed)
ABS: 240–260°C (nozzle), 90–110°C (bed)
Slow Down the First Layer Speed
Print the first layer at a slower speed (15–30 mm/s) to improve accuracy and bonding.
Most slicers have a dedicated first-layer speed setting.
Clean the Bed Surface
Remove dust, grease, or residue using isopropyl alcohol or mild soap and water.
Always start with a clean, dry surface for best adhesion.
Use Adhesion Aids if Needed
Apply a brim to increase surface contact.
Use glue stick, hairspray, or textured bed surfaces for tricky filaments.
Consider a raft if you're printing with warpy materials like ABS.
Check First Layer Settings in Your Slicer
Increase initial layer height (e.g., 0.2–0.3 mm).
Slightly over-extrude the first layer (e.g., 105–120%) to help with sticking.
Watch the First Few Minutes
Always monitor the first layer as it prints.
If anything looks wrong — stop and adjust immediately to save time and filament.
Summary:
Getting a great first layer isn’t magic — it’s all about precise leveling, correct nozzle distance, proper temperatures, and a clean surface.
Once you dial in these key factors, your prints will start strong and stick reliably every time. A little extra time spent setting up the first layer will save you hours of failed prints down the line.
Get Your 3D Projects Down With Unionfab
In fact, instead of printing the models yourself, you can also opt for a reliable 3D printing service provider to bring your project——especially urgent ones——to life, helping you avoid printing challenges and reduce unnecessary expenses.
If you’re interested, why not consider Unionfab? We’re the largest 3D printing service provider in China, having served over 80,468 companies and individuals, including well-known clients like Tesla, Schneider, Siemens, Adidas, DJI, and Thyssenkrupp etc.
As a China-based 3D printing provider, we offer a significant pricing advantage, 70% cheaper than European and American competitors without compromising on quality.
If you currently have 3D printing needs, feel free to try our online instant quoting system below or reach out us directly—we’re here to assist you 24/7 with dedicated support.

FAQs
How to fix a bad first layer?
To fix a bad first layer, check the following:
Re-level the bed
Adjust the Z-offset (nozzle height)
Slow down the first layer speed
Clean the print surface
Increase nozzle or bed temperature if needed
Use a brim or raft for better adhesion
How to improve first layer adhesion?
Make sure the bed is level and clean
Set the correct nozzle height
Use adhesive aids (glue stick, hairspray, PEI, etc.)
Increase bed temperature slightly
Lower the first layer speed for better bonding
Use a brim to increase surface area
What temperature should the first layer of 3D printing be?
It depends on the filament type:
PLA: Nozzle 190–210°C, Bed 50–60°C
PETG: Nozzle 230–250°C, Bed 70–90°C
ABS: Nozzle 240–260°C, Bed 90–110°C

